
Nintendo NES Zapper Trigger Kit Guide
1. Introduction
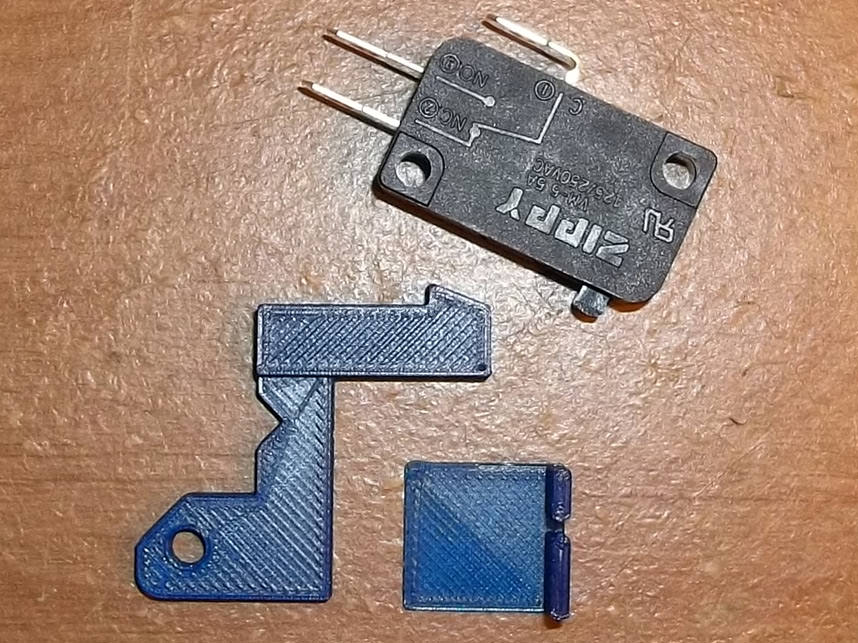
This kit removes the mechanical recoil from the Nintendo Zapper lightgun and gives the trigger a smoother, lighter touch.
Note that there could be some dimensional variance in the injection molded parts that the 3D printed parts fit into. You may have to perform some filing or use a razor/sharp knife to widen holes if things are too tight. I design these kits to be snug as it's better to have excess material instead of 'not enough.''
2. Opening
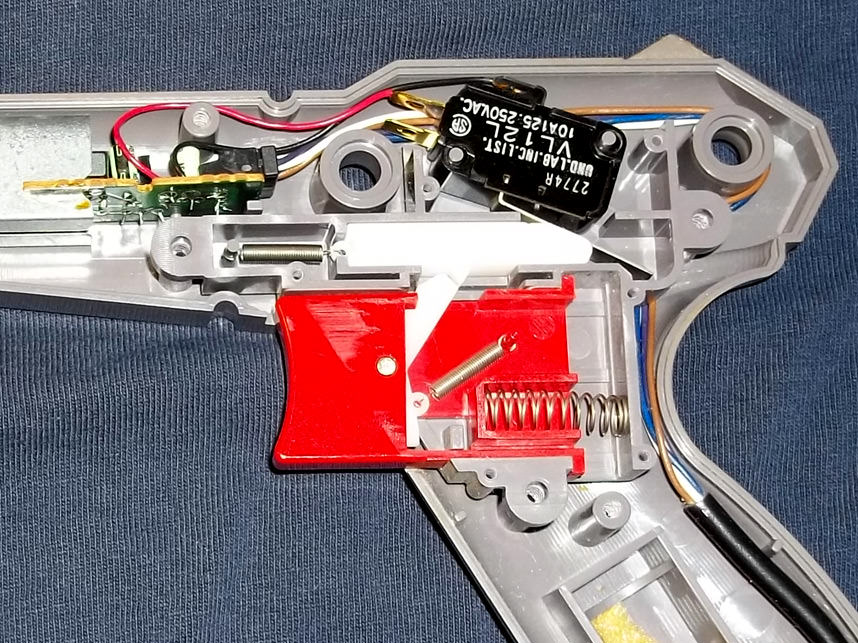
This is what you should see inside the gun once you open it up, you'll want to remove the tension springs and white plastic pieces in addition to the old switch. Be sure you don't lose the tiny retaining rod in the trigger.
3. Fitting
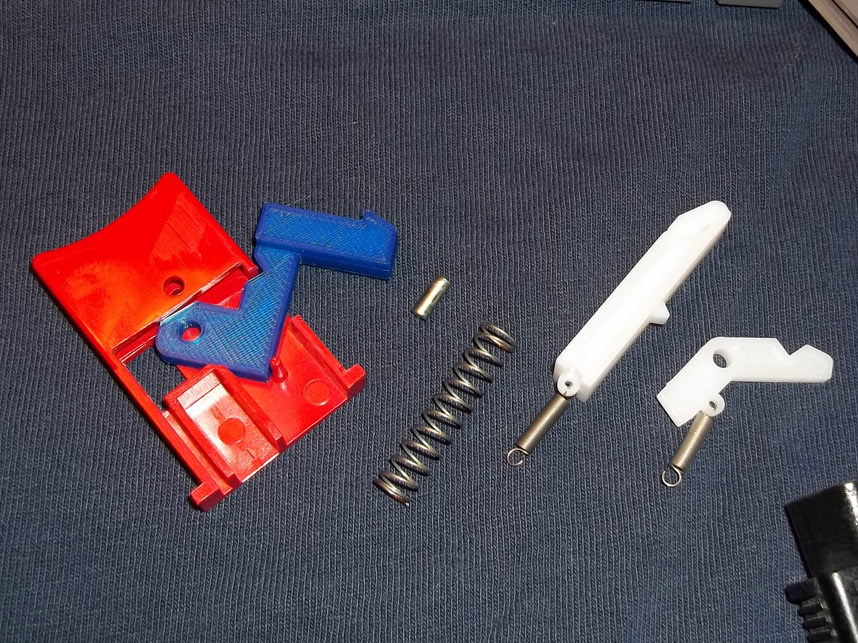
The trigger guide is designed so that you can easily press it down and then into the trigger, then return the retaining rod to hold everything together.
4. Wiring
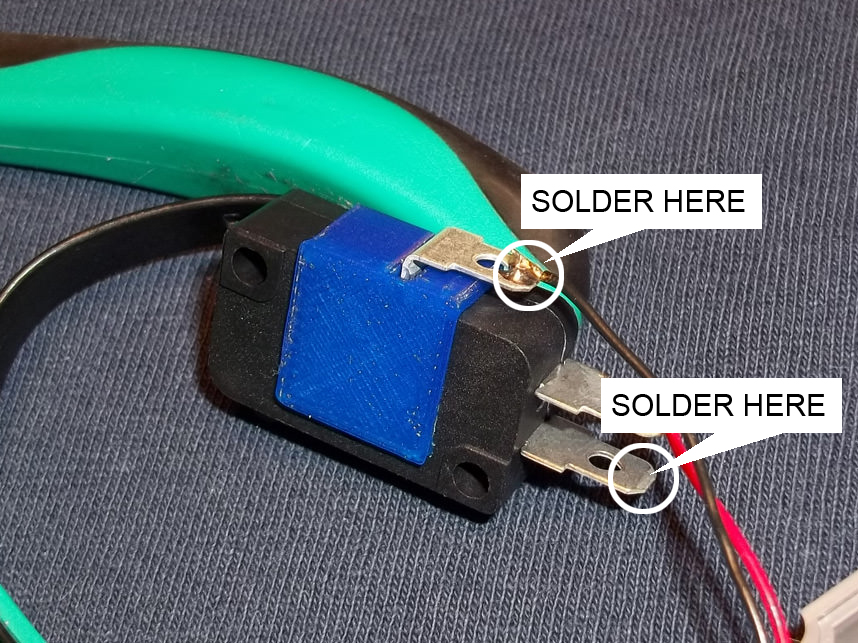
After you solder the new switch in, there is a spacer that I suggest you place on the underside, this helps hold the switch snugly in place and prevents rocking. You will want to connect the wires to the normally closed and common tabs of the switch.

5. Testing & Closure
Everything back in place as shown above, ready to be closed up. Give the trigger a test before you do though! If you find the trigger piece has difficulty sliding along the upper track, simply take a utility knife or file and shave along the bottom edges of the 3D printed piece if you notice it's not flush.