
Sega Saturn Stunner Trigger Kit Guide
1. Introduction
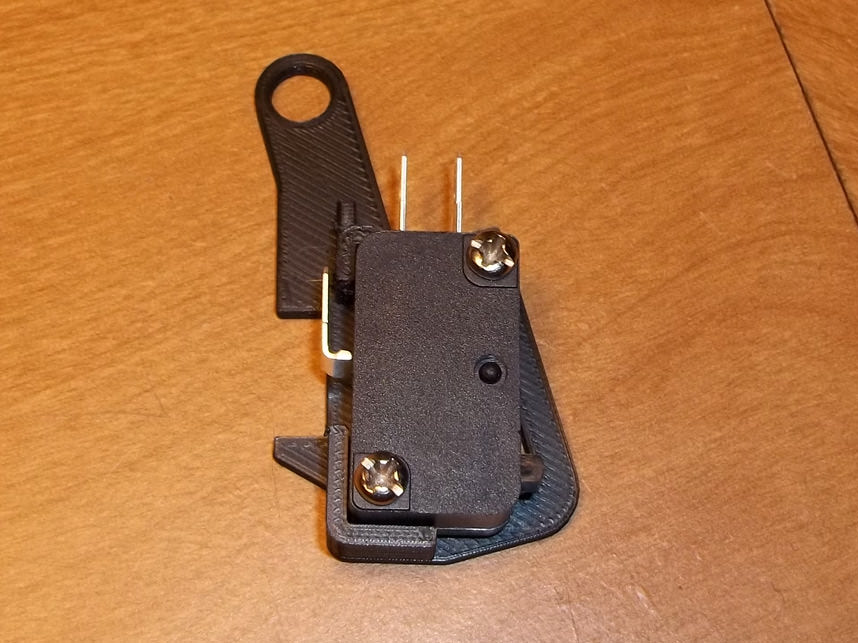
The Sega Stunner switch kit has been designed so that you can use standard microswitches with or without a lever.
Note that there could be some dimensional variance in the injection molded parts that the 3D printed parts fit into. You may have to perform some filing or use a razor/sharp knife to widen holes if things are too tight. I design these kits to be snug as it's better to have excess material instead of 'not enough.''
2. Opening
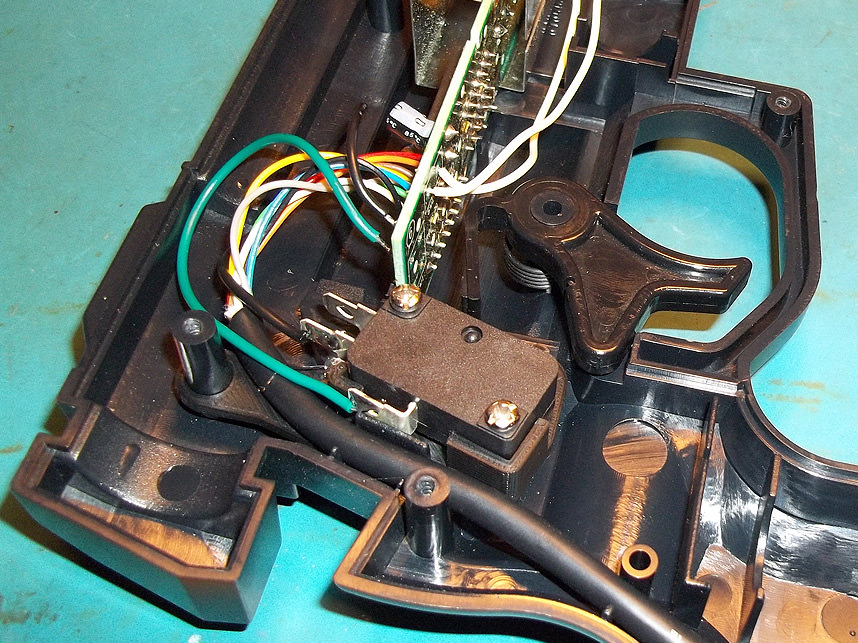
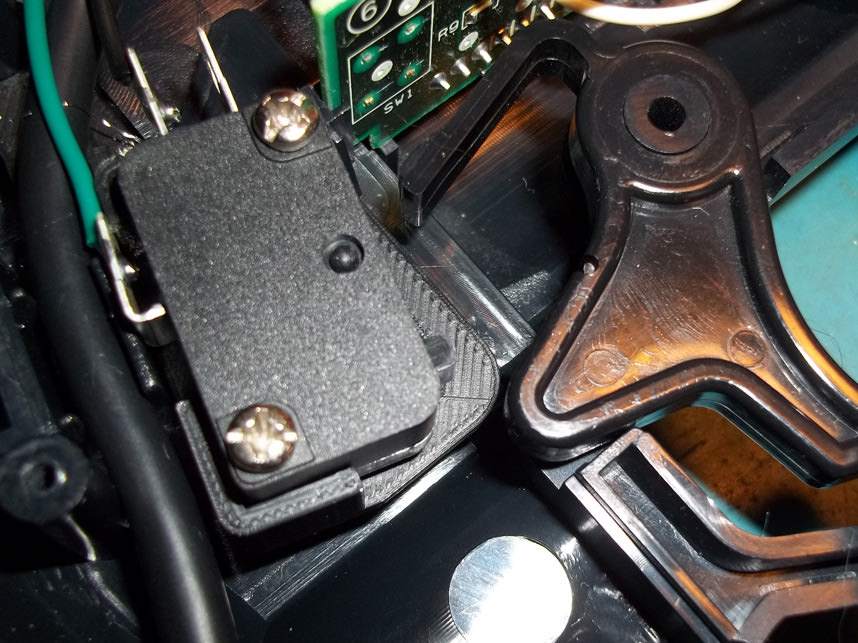
Installation is relatively simple: unscrew and open the Stunner housing, temporarily remove the controller cable inside, press the bracket down into place, and maybe secure with a dot or two of hot glue to keep it from rocking out of alignment. This may not be necessary, as it is a snug fit.
Remove the original button by either desoldering or clipping it out, then wire the normally open and common tabs of the switch to the original button's location on the Stunner's circuit board. Reroute the controller cable back into place afterwards.
3. Solder Points
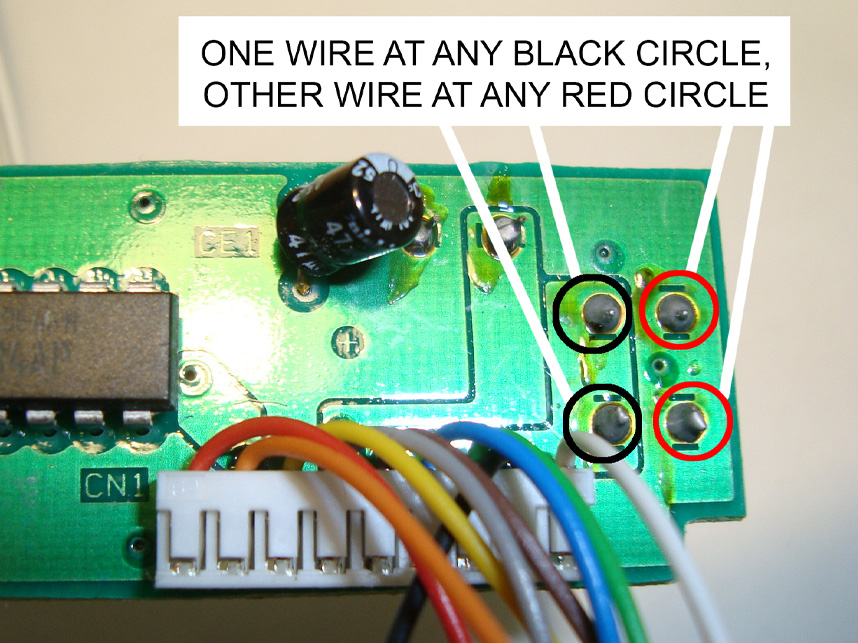
This picture points out where you solder the ends of the wires to the Stunner PCB. One wire must go to any single black circled point, the other wire goes to any single red circled point. This is located on the opposite side of the board where the original trigger button was located.

4. Trigger Prep
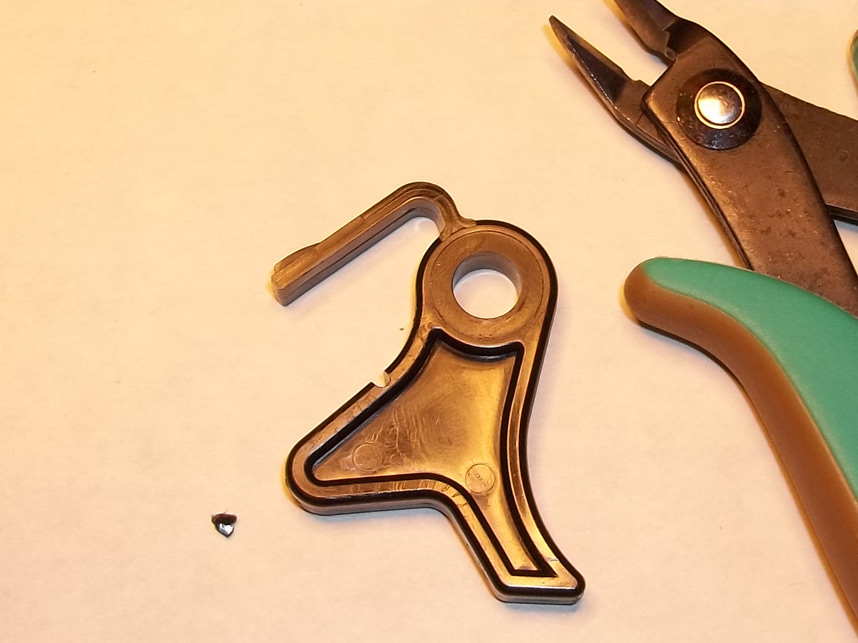
Because the back of the Stunner's trigger has a rolled edge, it's very important that the surface is smooth to properly actuate the new microswitch. These triggers often have a bit of plastic flashing left over from the injection molding process.
5. Cleaning Edges
Snip the excess plastic away and sand or file the surface a bit to get it smooth.
6. Switch Selection
Due to customer feedback, the kit comes with a 50 gram switch. You may want a clickier switch, or try a switch with a lever for a more rolling pull of the trigger.

7. Testing & Closure
If the action of the trigger feels a little coarse when it hits the switch, you still need to smooth the trigger with sandpaper or file it some more until it connects smoothly. This boils down to user preference. Lighter touch switches (such as the 50 gram or even 20 gram switches) result in less finger fatigue for longer gameplay sessions.