
Sega Dreamcast Interact Starfire Trigger Kit Guide
1. Introduction
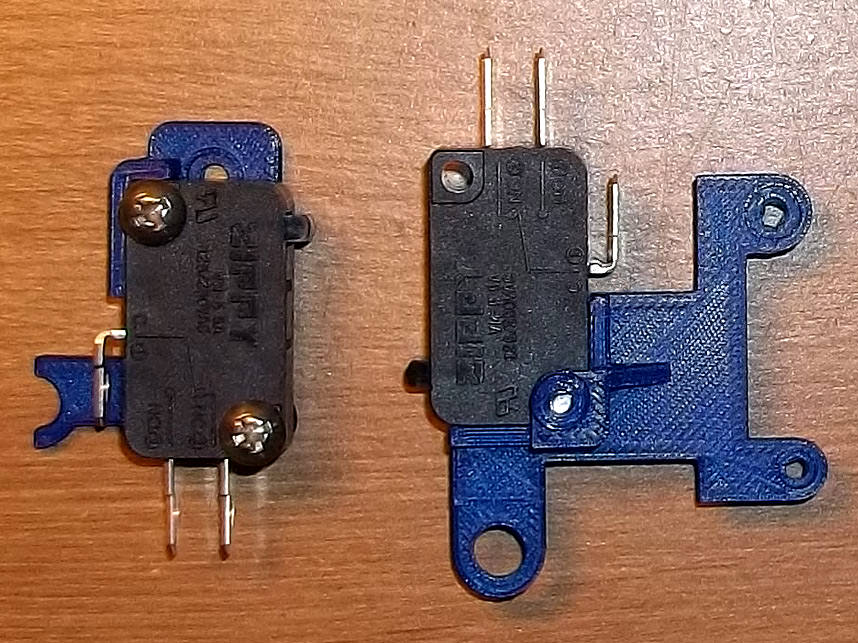
This kit replaces the original pushbuttons of the Interact Starfire light gun with microswitches behind the triggers, for improved tactility and more accurate pulls. It is a two-piece kit for the fore and aft.
Note that there could be some dimensional variance in the injection molded parts that the 3D printed parts fit into. You may have to perform some filing or use a razor/sharp knife to widen holes if things are too tight. I design these kits to be snug as it's better to have excess material instead of 'not enough.'

2. Opening
The install isn't very complicated, just unscrew the housing and take off the right half. Be aware that the Start & B buttons on that side are tethered by wire running to the other half, so just lay it nearby and off to the side.

3. Temporary Removal
You'll want to unscrew the small daughter board that holds the main trigger button, and also two of the screws on the d-pad board. Unscrew the switch from the smaller bracket of the kit as you'll be screwing that bracket in place of the daughter board, using the original screws.
4. Fore Trigger
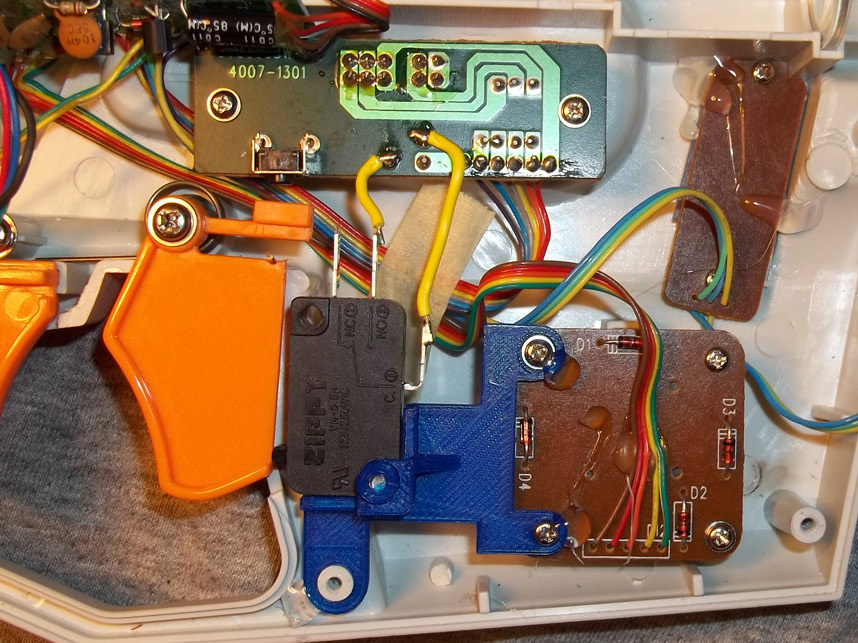
The fore trigger kit is fairly straightforward- slip it into place as shown, screw it to the d-pad board with the original screws you took out earlier, and wire it to the points above. By tapping these points, you're reusing a diode that likely prevents ghosting. It wouldn't hurt to secure the bracket with a few dots of hot glue so long as it doesn't interfere with closing up the gun housing once you're finished.
5. Aft Trigger
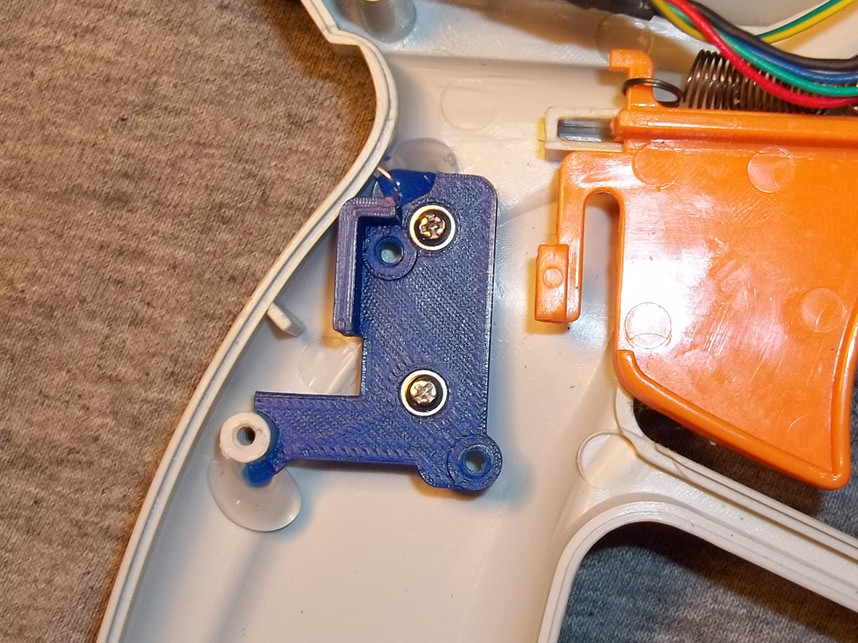
The aft trigger kit screws into place of the pushbutton board mentioned earlier. Again, securing it with hot glue helps prevent rocking.

6. Aft Connections
Solder wires to the following points on the displaced daughter board- by doing this, you're reusing a diode that prevents ghosting.
7. Wiring Aft Switch
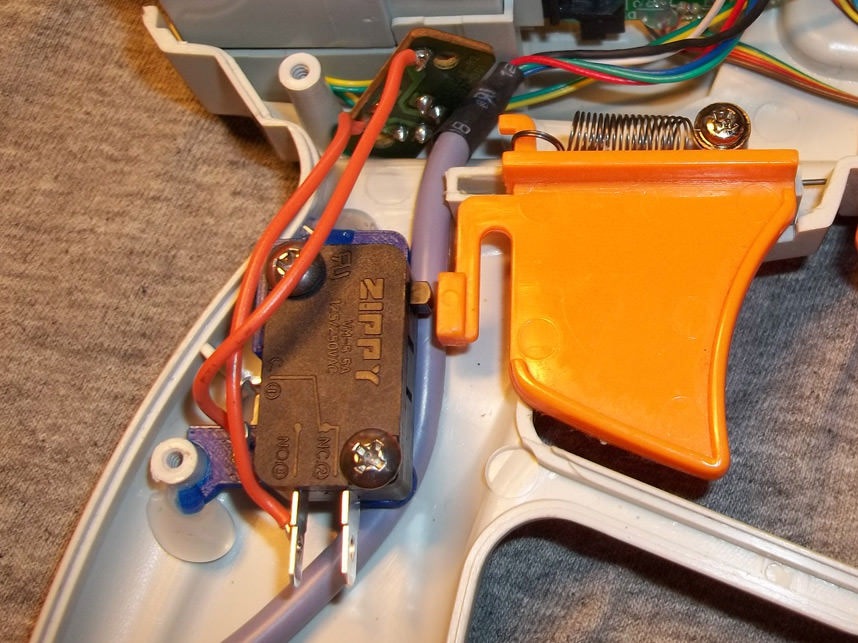
Solder the other wires to the common and normally open tabs of the switch, route the main controller cable underneath as shown, screw the switch into place on its bracket, and tuck the daughter board out of the way so nothing interferes with the trigger pull. After that, you can close the gun back up.