
Sony PS3 Guncon 3 Trigger Kit Guide
1. Introduction
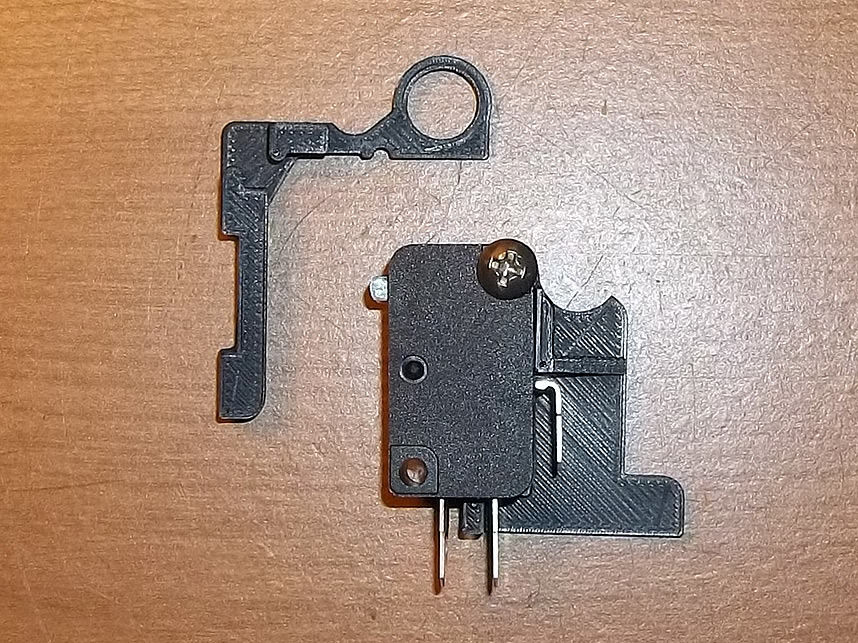
This kit installs a microswitch inside of the Playstation 3 Guncon 3, for improved tactility and more accurate trigger pulls. Since the PS3 gun is even more condensed inside than the PS2 version, please take care with the modification! The trigger piece by necessity has a thin component that could be snapped off if you mishandle it!
Note that there could be some dimensional variance in the injection molded parts that the 3D printed parts fit into. You may have to perform some filing or use a razor/sharp knife to widen holes if things are too tight. I design these kits to be snug as it's better to have excess material instead of 'not enough.'
2. Opening
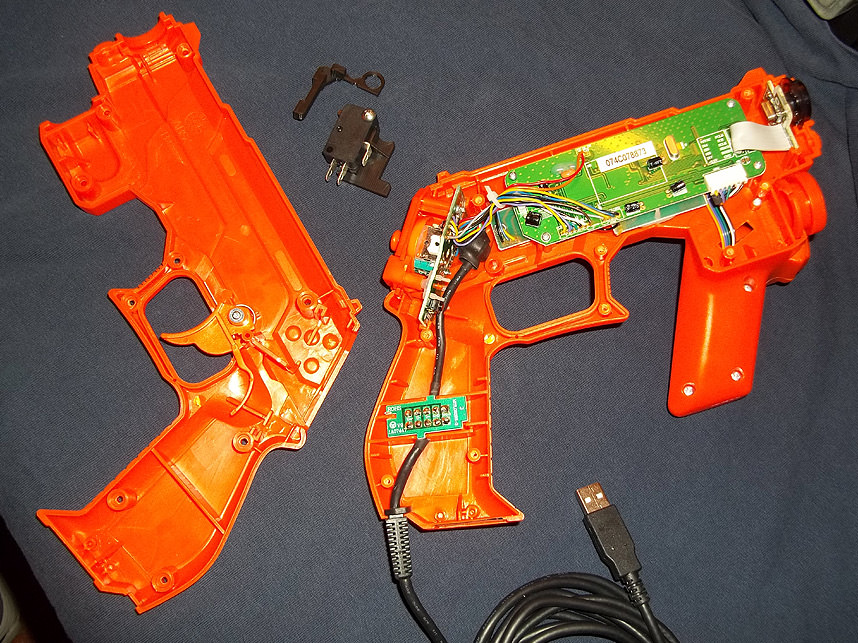
On opening up the Guncon 3 you'll note that the circuitry is on the left half while the trigger (and where the switch will go) is in the right half. Remember that the two shortest screws go in the trigger guard area, for future reference when you close everything back up.
3. Placement & Wiring
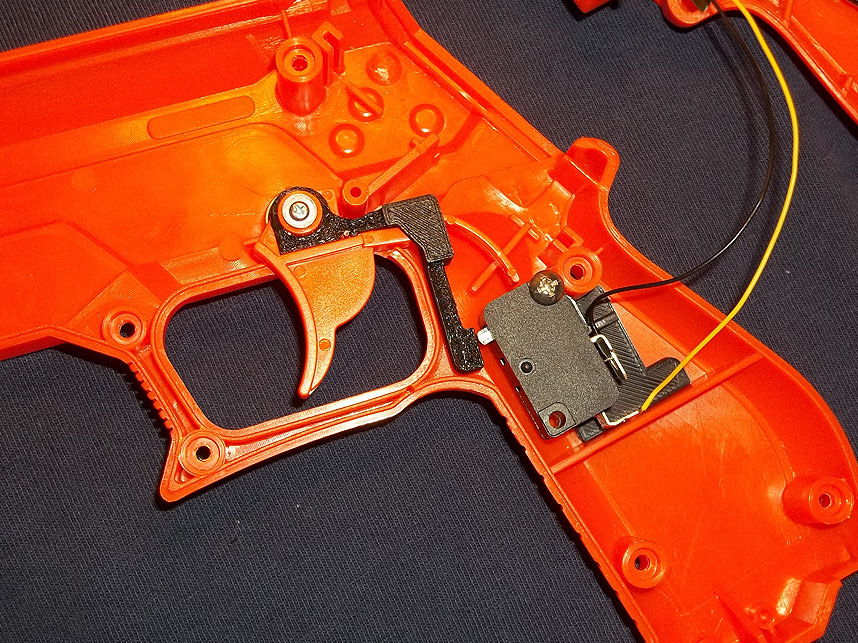
Before pressing the switch and bracket into place, you'll want to bend the bottom tabs at right angles. You may even want to bend-break the unused normally closed tab as shown above. Connect wires to the normally open and common tabs, then press-fit both the trigger piece and bracket into place. If you find the trigger piece doesn't slide into place easily, you may have to use a file to sand the inside of the hole that slides over the trigger plastic to get it started. Also note that the trigger spring's shaft needs to slip through a small hole so everything sits flush.
4. Anchoring & Testing
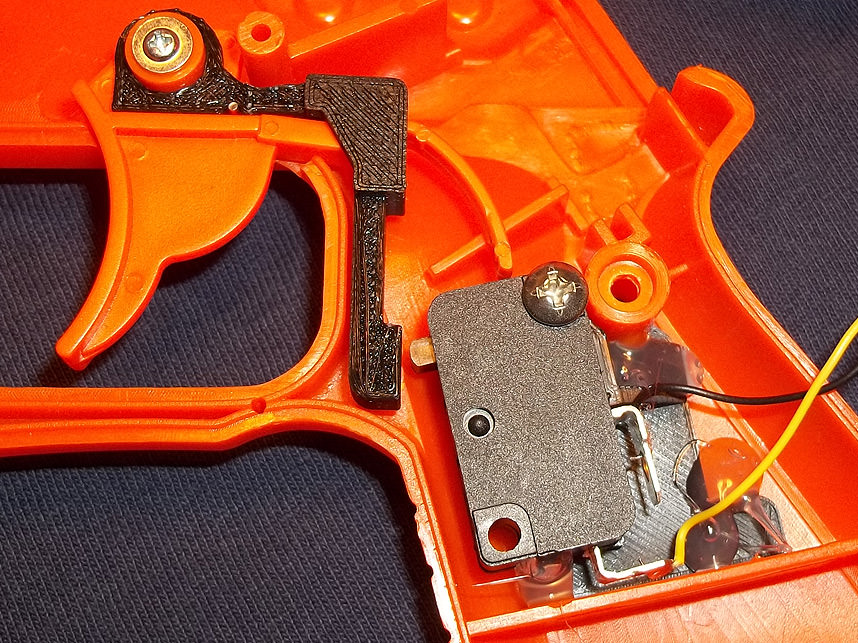
It wouldn't be a bad idea to apply a few dots of hot glue as shown to keep the switch bracket from swinging out of position. Be sure to test the trigger action to determine that everything's aligned properly.
5. Connections
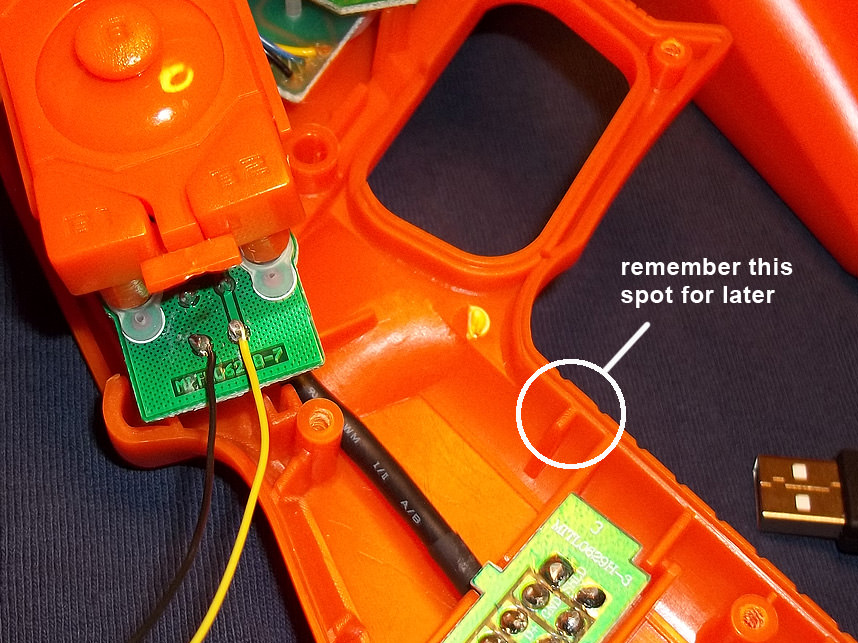
Solder the other end of the wires to the two points as shown on the control board- you shouldn't have to physically remove the original switch but you can if you want to at this point. Be sure to note the circled spot in the inside of the gun grip for later reference.
6. Placement
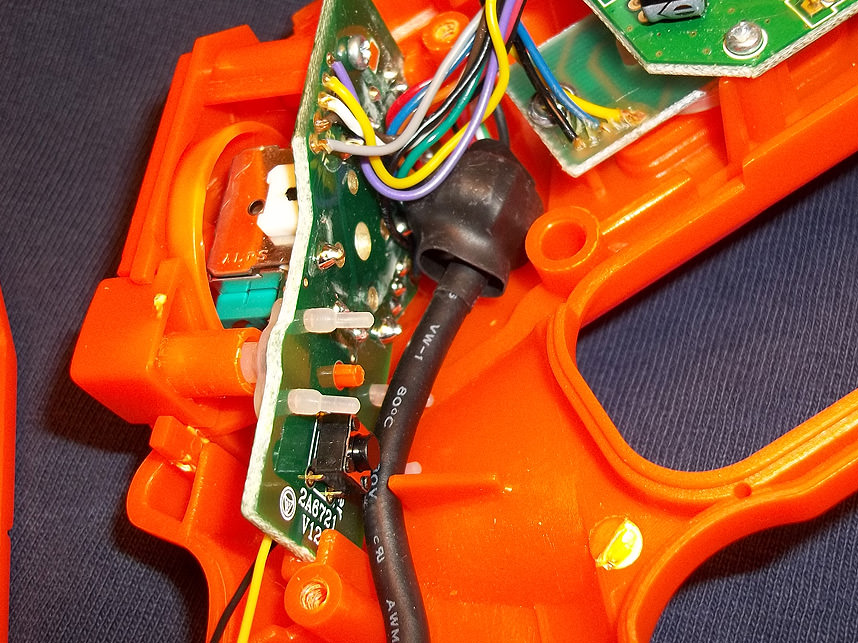
When replacing the control board, you'll probably want to make sure the main cable is routed as shown to keep it out of the way. And when you go to close everything back up, be extra careful to keep any wiring from getting pinched by the shell halves coming together.
7. Closure
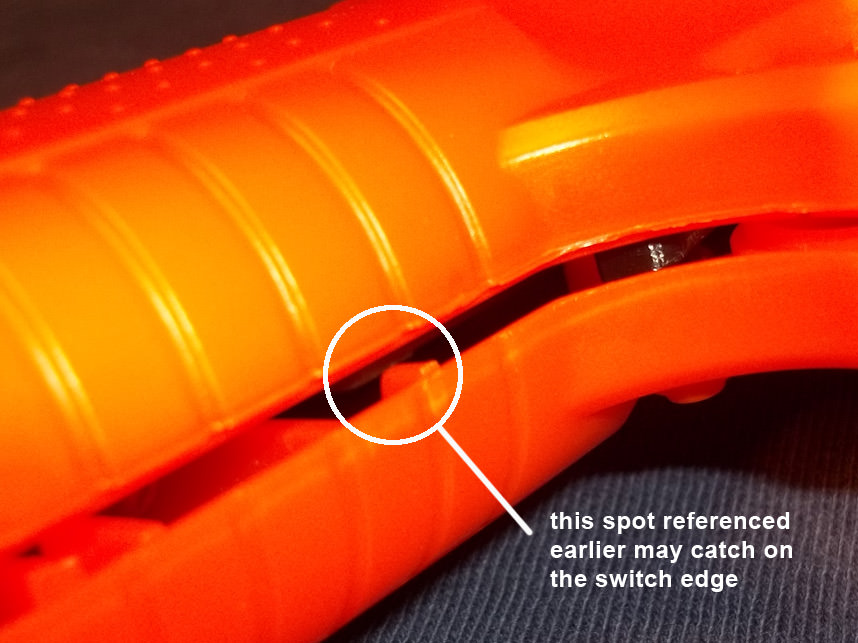
When you're about to close everything back up, you may encounter a little snag. The edge of the microswitch could catch on the plastic piece pointed out to you earlier. You shouldn't have to cut or modify any of this, just take a small flathead screwdriver or similar and gently press the side of the switch as you close the gun shell halves and it should clear the obstruction.
Screw the shell back together and test the trigger action to verify that it's light and springy. If it's not, you'll have to open it back up and rearrange something. Be very cautious that you don't pinch any cords or wires as you close things up. Currently I supply all kits with 50 gram force switches, but you can change that to the switch of your personal preference if you have any.