
Sony PS1 Konami Hyper Blaster Trigger Kit Guide
1. Introduction
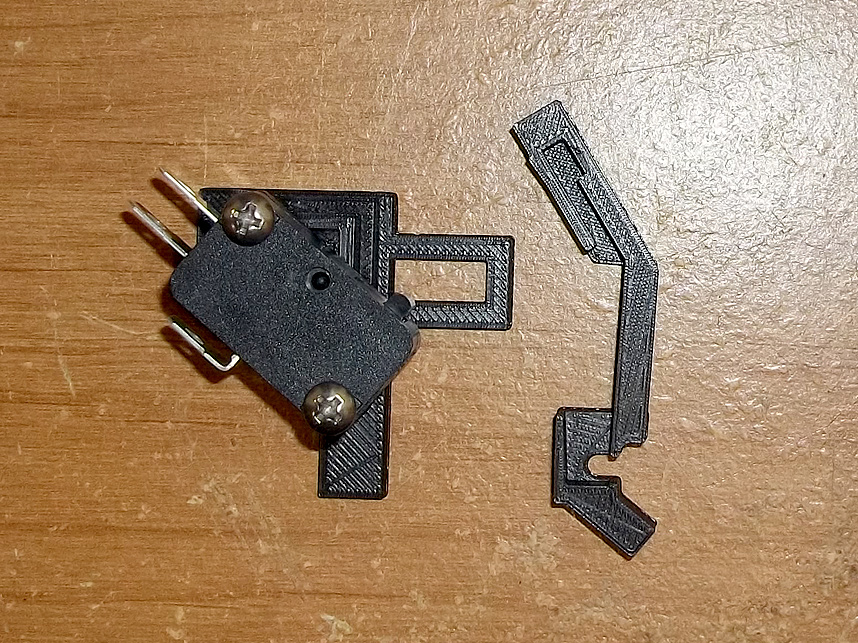
This kit installs a microswitch inside of the Playstation 1 Konami Hyper Blaster, for improved tactility and more accurate trigger pulls.
Note that there could be some dimensional variance in the injection molded parts that the 3D printed parts fit into. You may have to perform some filing or use a razor/sharp knife to widen holes if things are too tight. I design these kits to be snug as it's better to have excess material instead of 'not enough.'
2. Opening
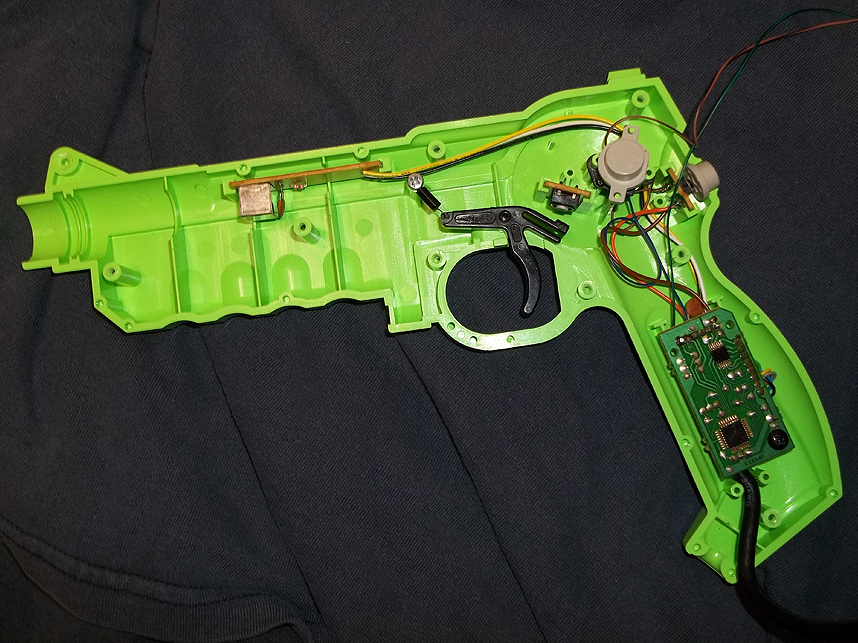
Remove all screws holding the gun shell together and lay the right half on an appropriate work surface. Note the original trigger switch board located just above the trigger piece- you'll want to remove the board (it slides right up out of the holding tracks) and desolder the wiring from it so that you don't hit this anymore.
3. Wiring Switch
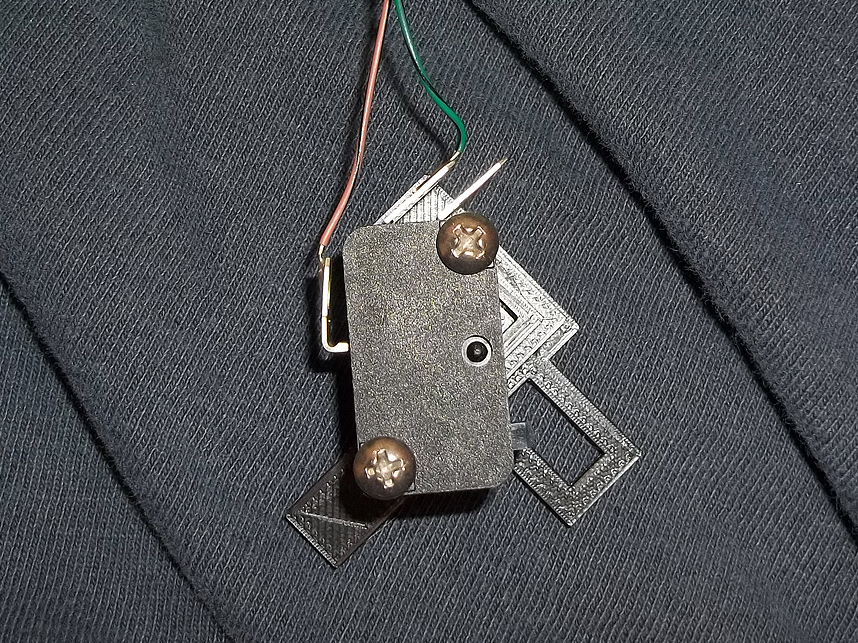
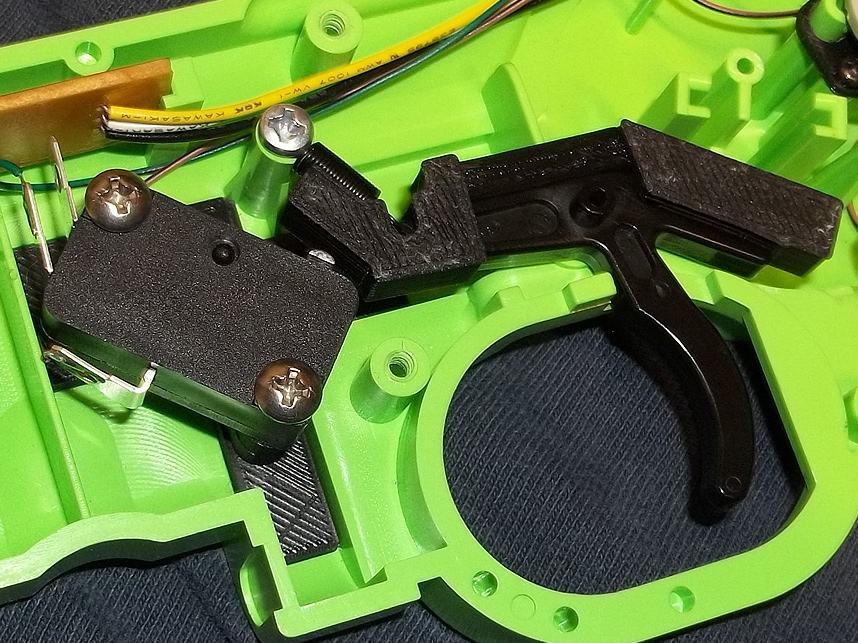
Bend the tabs on the new microswitch like so, and then solder the brown and green wire (or ground and signal) to the common and normally open tabs of the switch. You'll want to make sure that you preserve the ground connection for the other two buttons in this gun, and you'll probably have to add wiring of your own in order to reach the new switch location.
4. Placement
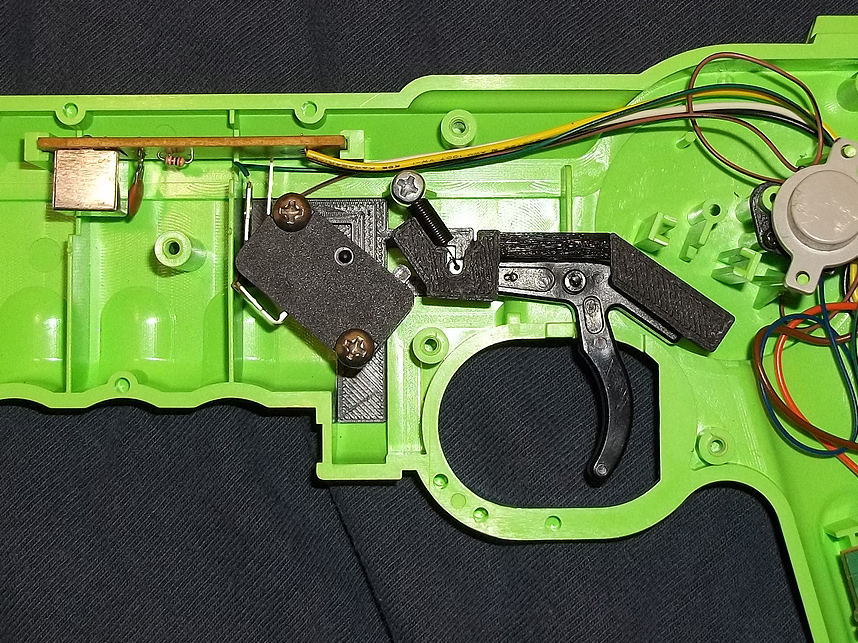
The switch bracket press fits into place as shown, and the trigger piece slips on top of the trigger to help extend its reach. You might want to secure the switch bracket with a few dots of hot glue to keep it from shifting out of alignment but this may not be necessary as it's designed to be a snug fit.
5. Testing & Closure
Test the trigger to make sure that it's actuating the microswitch, then close the gun back up- making sure that none of the wiring inside gets pinched between the plastic halves.