
Nintendo NES Compatible Zapper Revolver
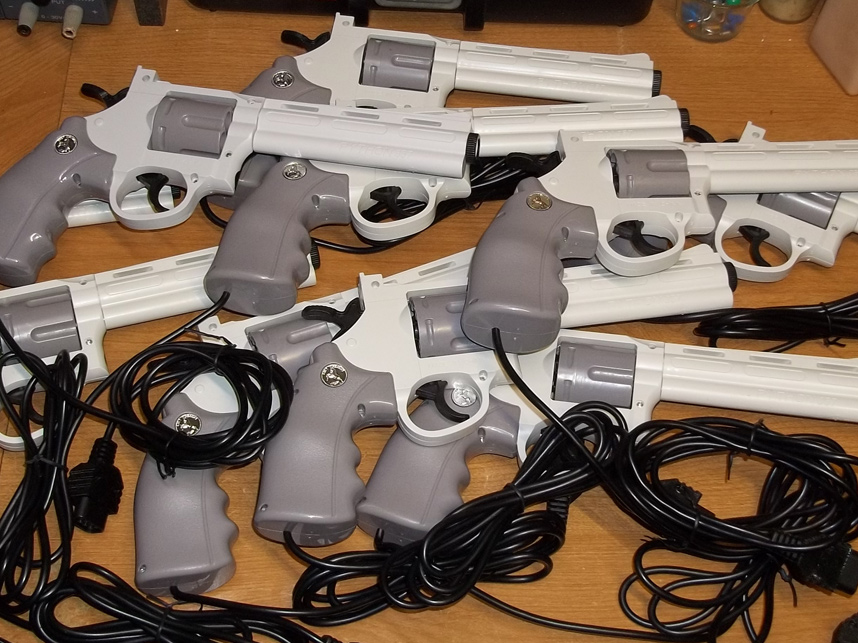
Here's a custom video game lightgun made out of a toy revolver that originally shot spring-loaded plastic bullets, but now it shoots immaterial pixel ducks on cathode ray tube televisions. The PCB was designed by Boojakascha which is a modified circuit found in various clone lightguns often paired with bootleg/pirate NES game systems. As documented on NESLCDMOD these guns can be coaxed to work on modern LCD displays with a little tweaking and ROM patching, but in the spirit of playing with trash the use of CRTs left by the side of the road is always preferable and strongly recommended. This project was completed in June of 2026.

1. Introduction
We're all familiar with the standard issue orange (or sometimes gray) NES Zapper that came with Nintendo's 8-bit console released in the west, but the preceding Famicom in Japan got a sick black revolver with working hammer action. Bringing that experience over to the NES after so many decades of such a terrible (but very understandable) omission was the goal!
The shell itself is a generic unbranded toy commonly found through overseas vendors like AliExpress, though for what it is, very nicely designed. The cylinder rotates with each pull of the trigger to continuously shoot one spring-loaded bullet after another as the hammer snaps back and forth. Preserving this mechanical action of the cylinder & hammer while stuffing the guts of a lightgun inside such a restricted interior took some trial and error but overcoming this challenge was very satisfying.
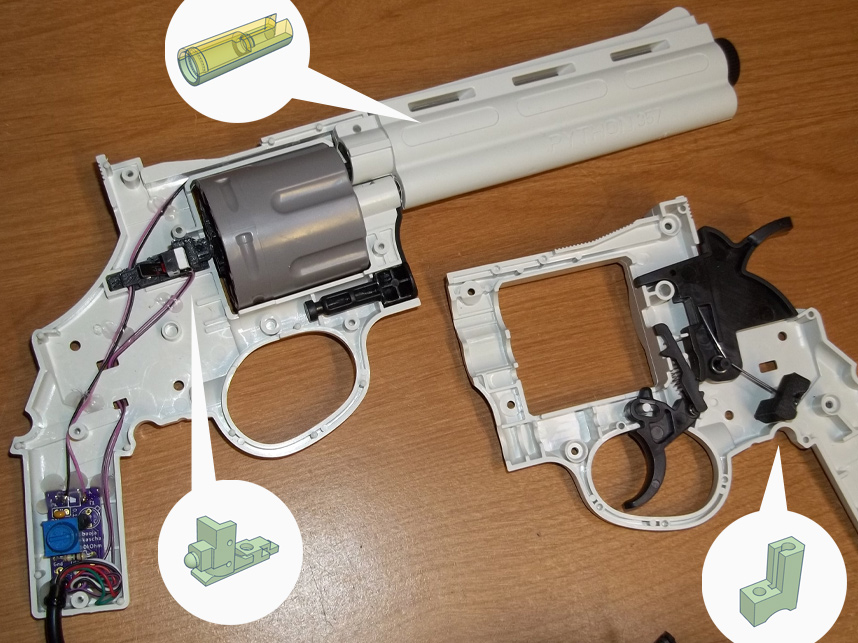
2. Guts Of A Gun
Inside, a sensor assembly had to be inserted into the barrel with adequate wire routing for the light sensor to reach the circuit board mounted further away in the grip.
Then a bracket had to be designed to hold a switch directly behind the cylinder so the movement of the hammer triggered alternating states. This part also had to securely center the cylinder while enabling it to still turn. Additionally, accommodations had to be made for the lever action of the trigger which is responsible for pushing the cylinder around.
Finally, a retention piece was made to help hold the hammer return spring in place to stabilize the mechanism a little better.
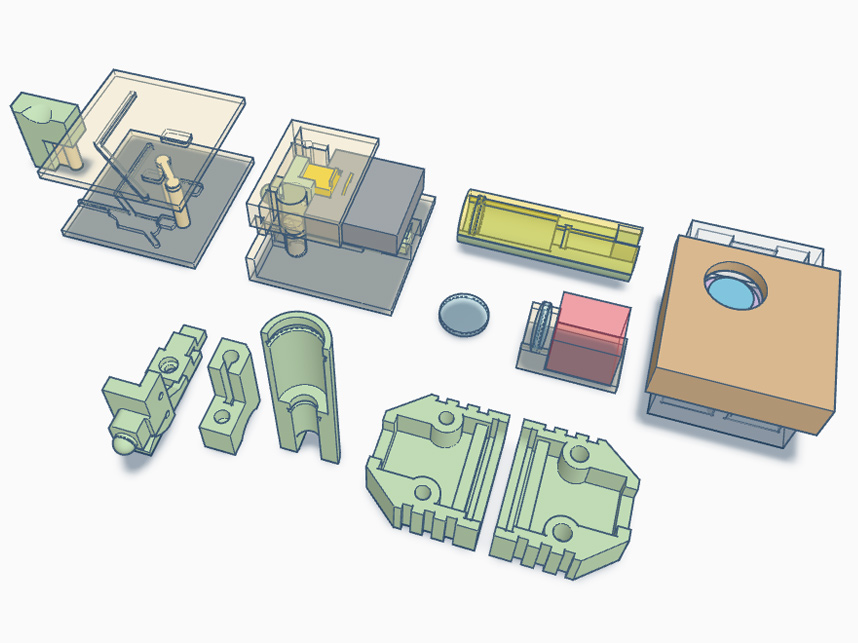
3. Parts Plentiful
All of these new parts were designed around the interior constraints of the gun's shell, where relevant areas are duplicated in CAD to keep track of what might work and what won't.
The light green pieces in the forefront of this picture are the final iterations (including a new casing for the NES controller cord plug to make assembly easier and neater since the plugs have to be re-wired for Zapper functionality) while the models in the rear are all spatial representations of the shell, internal pieces like the hammer intended to hit a switch, or a template for drilling a hole in the gun's handle for an adjustment pot to peek through.
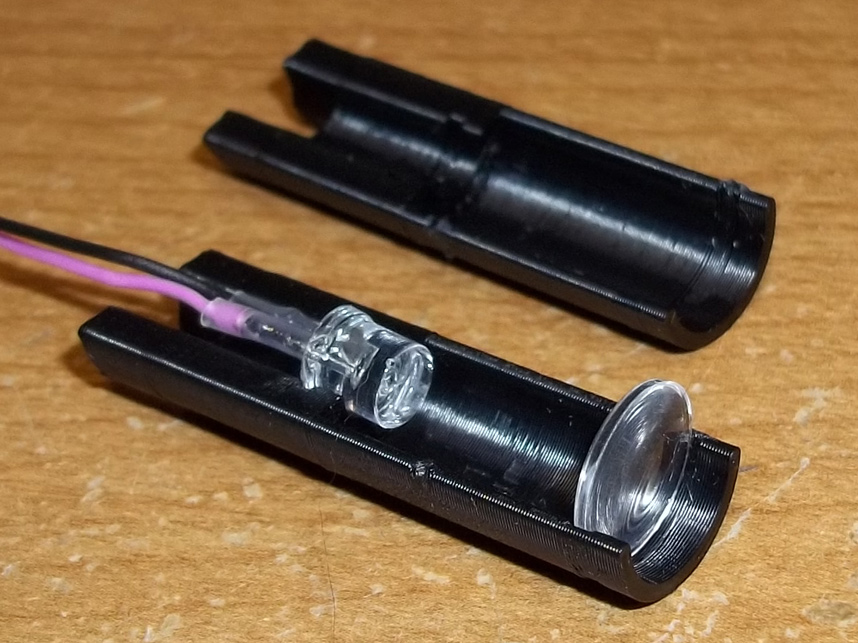
4. Optics
Looking more closely at the most defining component of this lightgun, or any lightgun, is the sensor assembly which detects whether a target on screen has been properly aligned with the barrel of the pistol as the trigger's being pulled during play. The eye in this case is a combination of an acrylic biconvex lens set ahead of a 5800B / QT523C-EE1 photodiode. Placement of the lens was crucial to pin its focal point over the diode so that anytime a target in Duck Hunt is shot at, the flash of white that registers a hit is easily read.
Sandwiched together between two halves of FDM printed plastic, this tube is tucked far enough into the back of the barrel and surrounded by a black liner so incidental light won't give false positives.
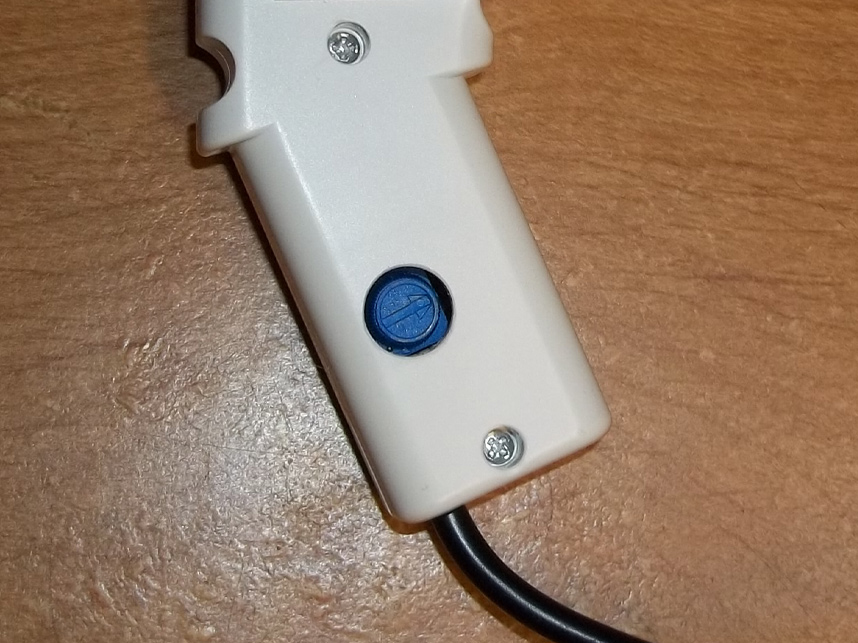
5. Potentiometer Placement
The aforementioned trim pot shows through nicely in the lower handle of the gun once the gray grip has been unscrewed apart. This allows for adjustment of the sensitivity of the lightgun to help dial in functionality with LCD televisions, though it's not a foolproof function and benefits best from the use of patched games.
To get this hole consistent with the location of the circuit board underneath a template was made to mark the perfect spot, then drilled out.
6. Doomed Ducks
The upside to designing 3D printed add-on parts and templates is that the end result can be replicated almost effortlessly. Well, ignoring the time involved in assembly of course.